Thursday, February 19, 2009
Saturday, January 19, 2008
Trunk Lock
It was a pretty frustrating day on the car. Did some unsatisfying stuff like sanding the underside of the bonnet and the drip edges inside the front wings.
And I sanded down the inside of the trunk and sprayed some rust conversion product on it. It's called Krud Kutter I think. Like most of those products it's a phosphoric acid based solution that turns the rust into some other inert compound before painting it.
The worst part of the day however was when I decided to remove the lock from the trunk so I could sand the rust around the outside. After removing the part inside that connects the button to the latch assembly, I shut the trunk. Crap. Even though I knew how the latch worked and could picture it, I tried for an hour with various tools to pop the latch from the inside by reaching in through the tail light holes. No luck. In the end, I drilled a 1/8" hole below the button and popped the latch with the tail of a file. It's bad enough that it's taking so long without creating more work for myself. Now there's an additional hole to fill.
Monday, January 14, 2008
January 12, 2008 Applying Body Filler
Passenger rear wing:


Driver front wing:


Driver dogleg:


Sunday, September 30, 2007
September 30, 2007 Tie Rod Ends

Followed the procedure of counting the turns for removal and then installing the new ones the same number of turns.
Removal of the ball joint end was aided greatly by a simple little tool from Princess Auto. Instead of banging a pickle fork type of remover into the space, this little tool wedges the two apart with a bolt. It popped apart with no effort and didn't destroy the boot at all.

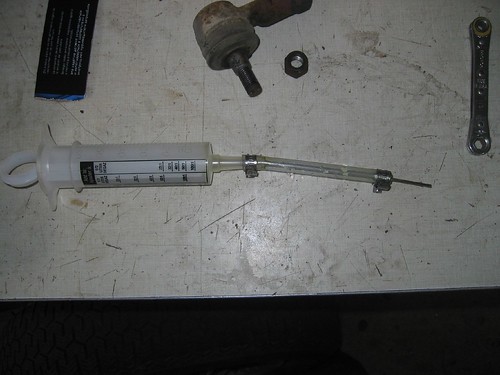
The most difficult part of the operation is the refilling of the rack with oil. I used a soccer ball inflater to fill the boots before snugging them up with the zip ties.


Thursday, September 6, 2007
September 6, 2007 Maiden Voyage
September 6, 2007 Clutch Hydraulics
I was hoping to take it out on its maiden voyage at that point. Got a seat installed, put a fire extinguisher in the cabin and hopped in.
Pushed down the clutch pedal and grabbed the gear shift to pull it into reverse...
Nothing...
Pushed harder, grind...
Clutch isn't engaging. Damn.
Opened the Obsolete Auto flyer and ordered up a Clutch Master Cylinder, Slave Cylinder and hose.
The most challanging part of this job is reaching the lower fastener on the front of the master cylinder. It needs to be reached from inside, under the dash through the firewall using long wobble extensions.


Not easy.
Installation of the slave cylinder and hose was pretty straightforward. The only wrinkle is that the slave ships with the bleeder in the wrong hole for some reason. Get this wrong and the system can't be bled in the conventional way.

I used the reverse bleed method anyway, pushing fluid up from the slave rather than trying to pump air out of the bleeder. Worked great.
Tuesday, August 7, 2007
August 7, 2007 Alternator Upgrade
People say it has trouble keeping the wipers going strong when the headlights are on.
So, after reading about it on many sites I decided to go with one of the most popular MGB upgrades: the Delco alternator. Luckily, the Delco alternator that originally fit a Saturn will bolt into an MGB if the face is rotated one third.
Originally I went to the local wrecker's all-you-can-carry-for-$50 day and pulled 3 good Saturn alternators, but in the end I decided that I would invest in a new one with a warrenty, just so I knew I had a working one.

In order to rotate the alternator face, I needed to loosen 3 torx connectors. One of which is hidden behind a plastic shroud. I used the dremel to cut a hole for a torx socket to get to the fastener

Cut the connectors from the original Lucas Harness and spliced them to the new Delco Harness from the salvage yard

I used a chrome pulley from a GM that I picked up at performance improvements. It's a bit bling for my tastes, but you don't see it much when the rad is installed.


